
I have been side tracked lately with a lot of projects / work stuff that amount to not doing the stuff I really enjoy. One of those things I really enjoy is painting. I have a fair number of acrylic craft paints that come in these little round tubes. They can be a challenge to store in an easy to see and access way.
We had this wire rack system from years ago. My wife saw a video that showed a great way to reuse some of the panels from this “build it yourself” paint rack display. To be honest, we still have a number of these in use – they are shaky, but standing and holding some lighter weight things. We did have some leftover panels. Time to make a paint rack!
I watched a couple of videos that gave variations on how to connect the two wire bits in a way that made sense for hanging or mounting the rack on the wall. I don’t consider my art supplies to be art in and of themselves most days. I wanted a “floor mounted” model if you will. I was also not a fan of finding properly sized plastic pipes in white, finding matching caps or any of a list of other things. I wanted this to be something I could do at home with what I had on hand.
I needed a spacer that was about the right size and stumbled onto a video where the woman making her version of the rack used a child’s alphabet blocks. I didn’t have alphabet blocks anymore, but I did have a scrap chunk of lumber. I grabbed the saw and cut some little blocks (about 1” or 2.5cm). How to hold them? Zip ties of course. I drilled a single hole through one corner of each block and fastened it once in each direction (up/down, left/right) for stability. Spacing achieved!

Next up was the other side. My initial thought was to make a solid wood piece, but my woodworking skills and tools have a very low limit. Cutting and drilling was about as far as that was going to go… BUT I have XPS foam! A-ha!
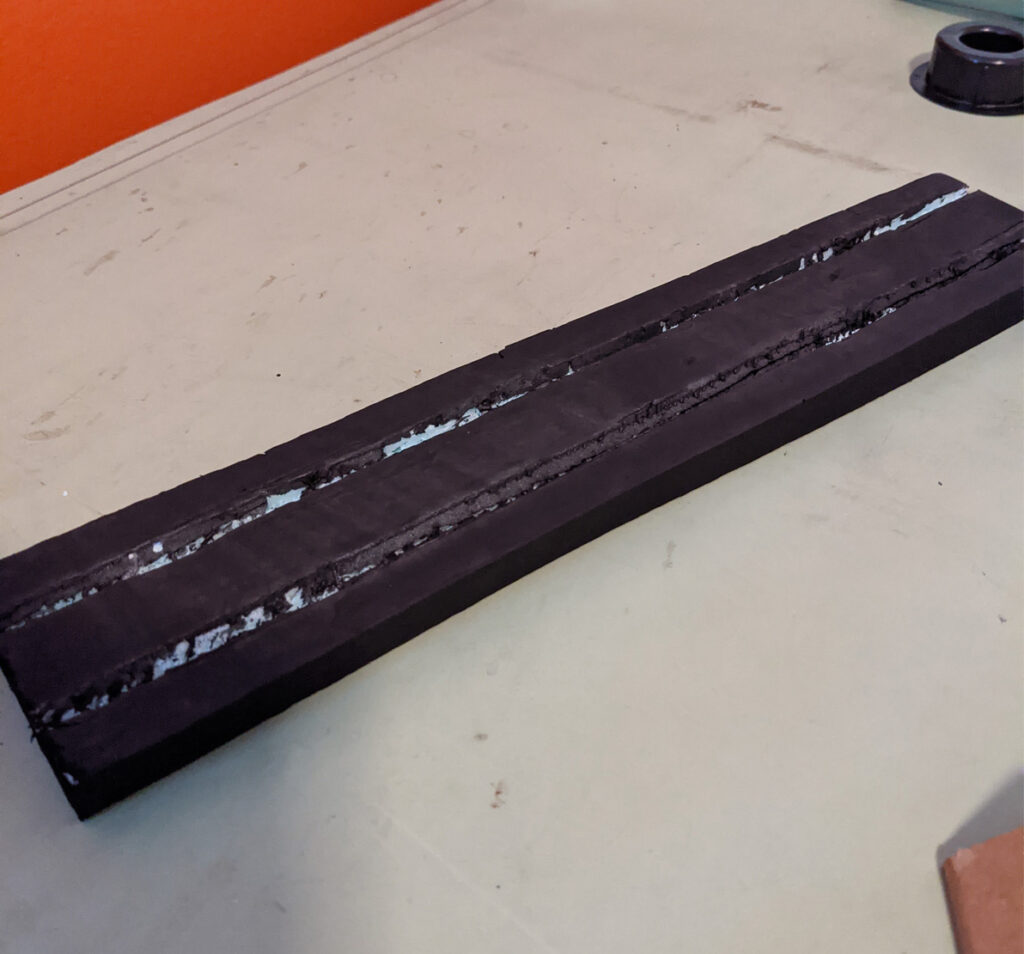
So I carved up 2 slabs of foam and cut grooves into one side. This is one of those times when I wish I had a hot wire cutter for the foam. Doing this by hand with a hobby knife was rotten. It’s gouged, uneven and not pleasing to the eye. I wasn’t overly worried as the grooves should be on the side you wouldn’t normally see. I painted them up and waited for them to dry. I still hate waiting.
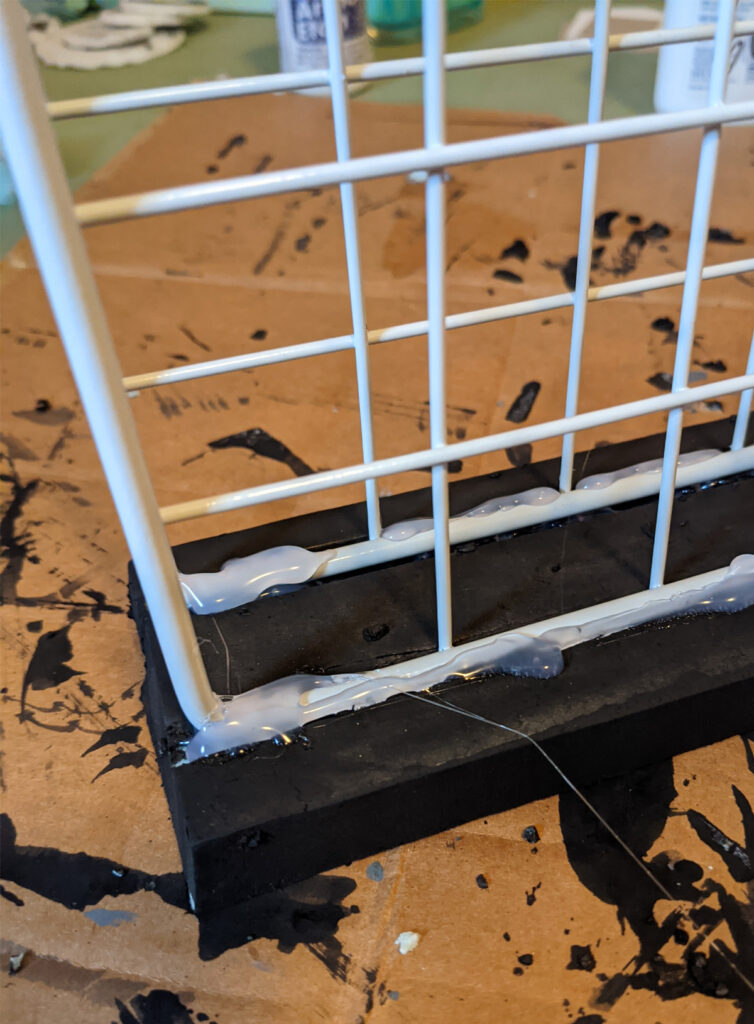
Next step – attach the foam. What to use? Hot glue. It’s what I have and it shouldn’t need to stand up to a ton of abuse. I should just need to make sure the top edge stays in place. Once the glue was dry, done!
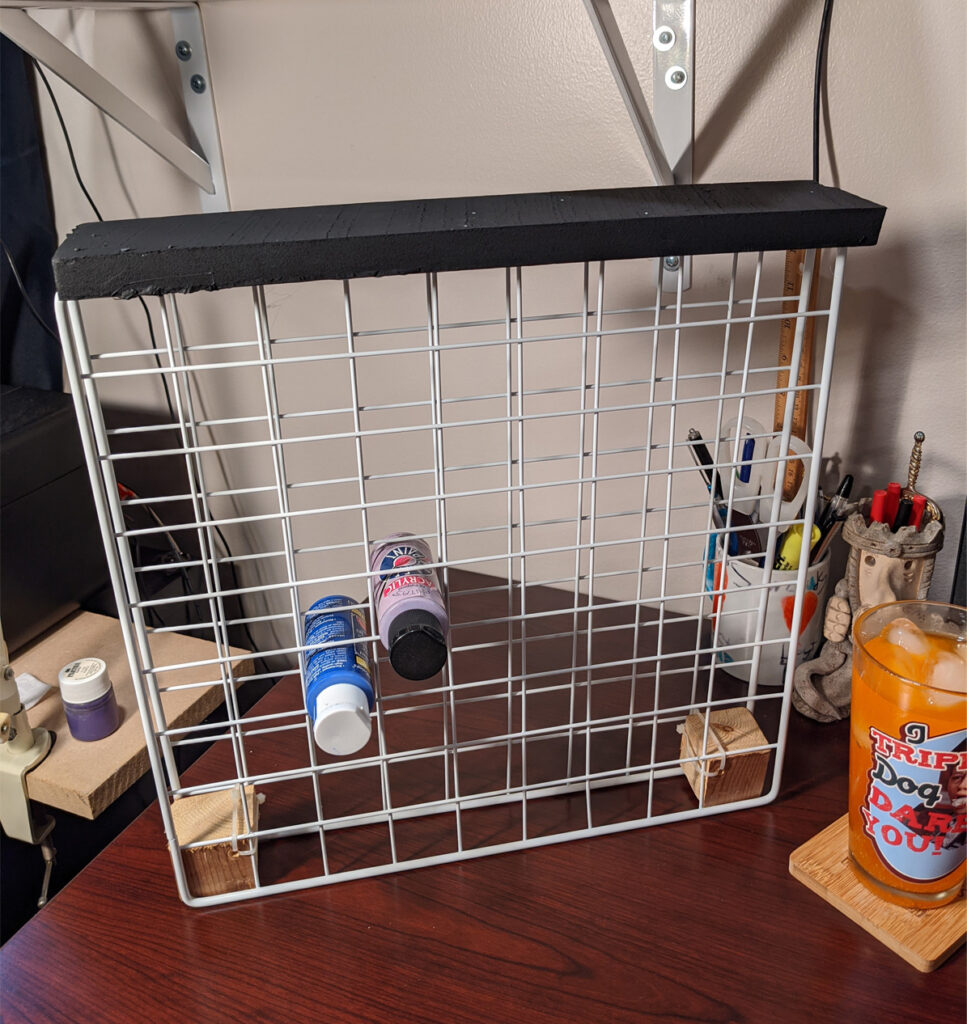
In practice, when my wife started filling the paints in the rack fell over. She was not pleased. The position as shown in the picture is less than effective for actually standing up while holding paints. Solution? Turn it over. So, the smooth black painted foam is now on the desk acting as the stable foot and showing off all the nasty glue work, the parts of the foam that didn’t get painted right and the unfinished side of the wood block. In the end it is not about the look of the this rack, it’s about the function. Now I’ve got a pair of paint racks that will hold the majority of my paint collection at almost no cost ~ and I didn’t have to leave the house.
Onward to the next project! What are you working on?