Spell Effects

I have a lot of actual work to do. I have 2 deadlines for edits that I need to hand in and some website work I need to do to get my site here cleaned up a little. Add a couple of professional touches that I am missing. I just wasn’t feeling it today. As happens so very frequently of late, I couldn’t sleep. My body is still in rebellion about something with aches, pains, and lots of other unpleasantries. So when I finished my second cup of coffee this morning I decided that some crafting was in order. Take on a small project, finish something and see if that would help.

My project of choice today was creating area of effect / spell effects for my D&D game. I picked a handful of spells and set about trying to make them in a form that we can just drop on my shiny new dungeon tiles next time we get to play.

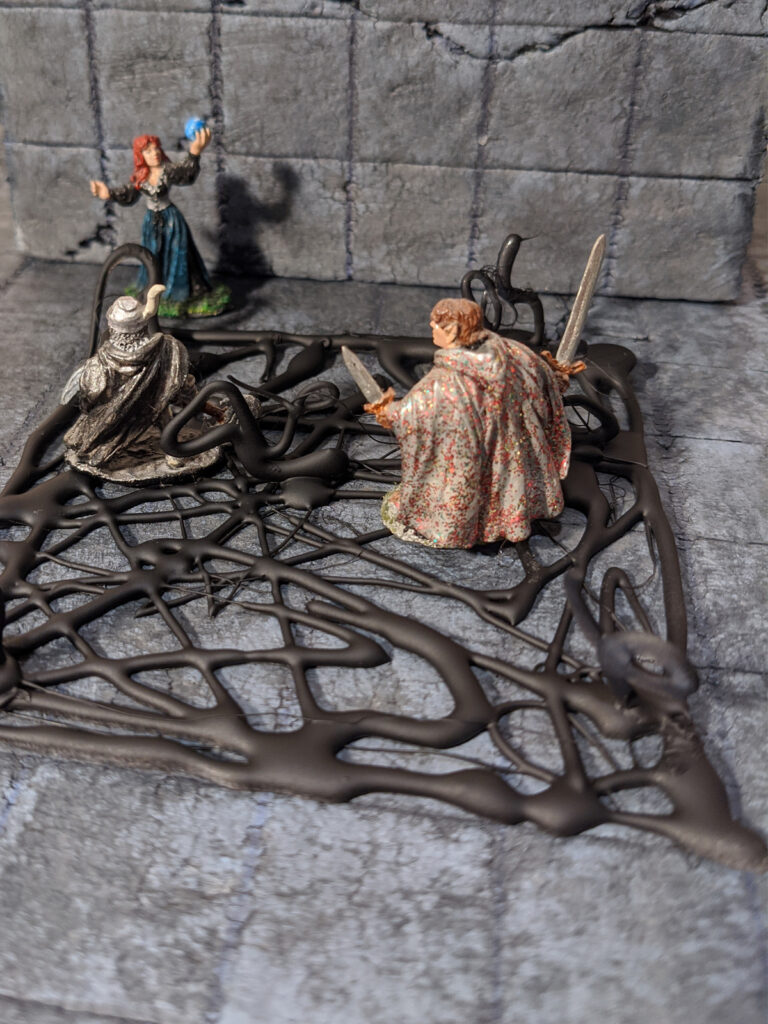
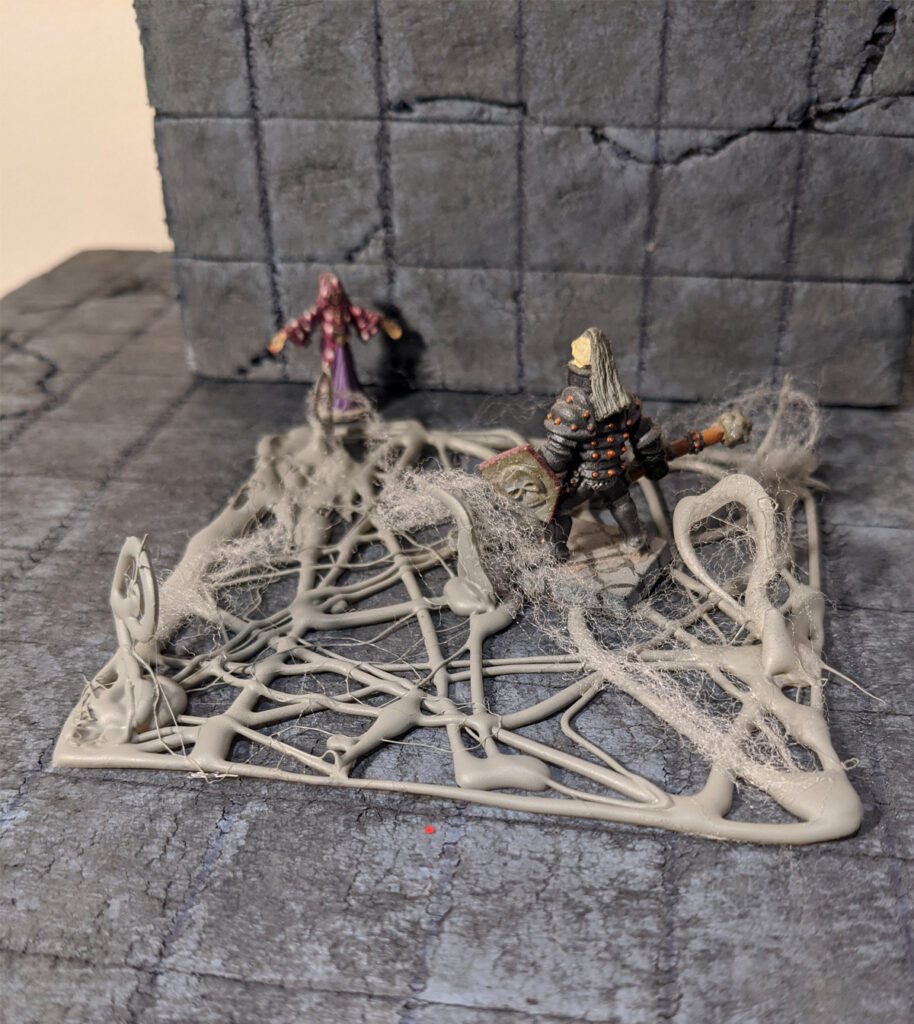
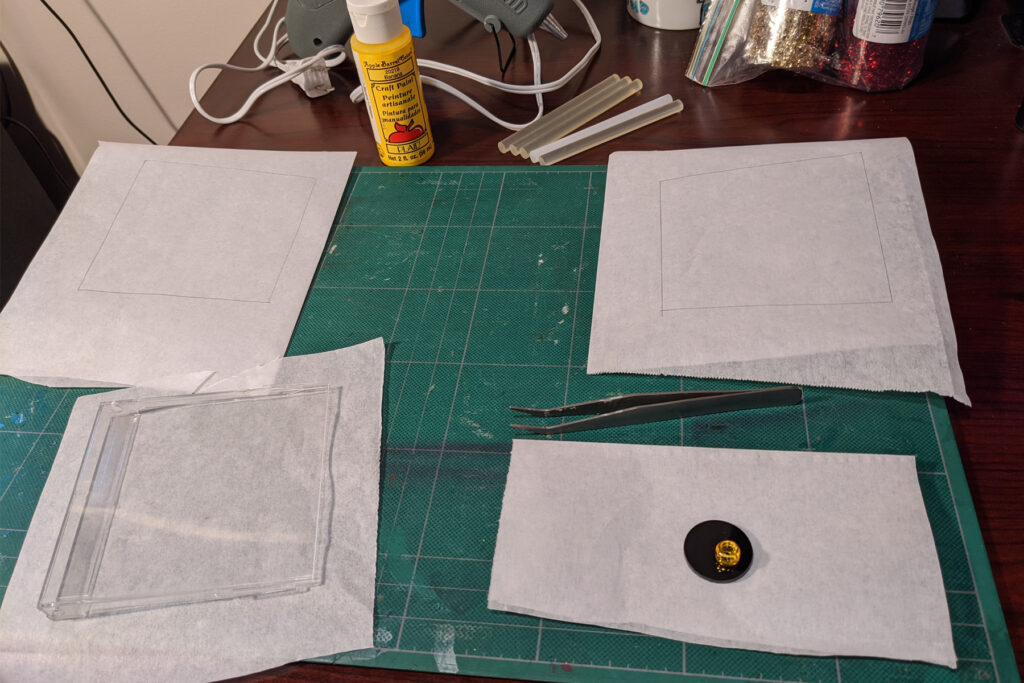
Sculpting things with hot glue is an art form. It takes practice. I gathered up the stuff I needed and laid things out. The spells I decided to create for were web, Evard’s black tentacles, entangle, flaming sphere and wall of fire. I’d seen a video talking about how to go about making most of these before and they felt like things I could handle.

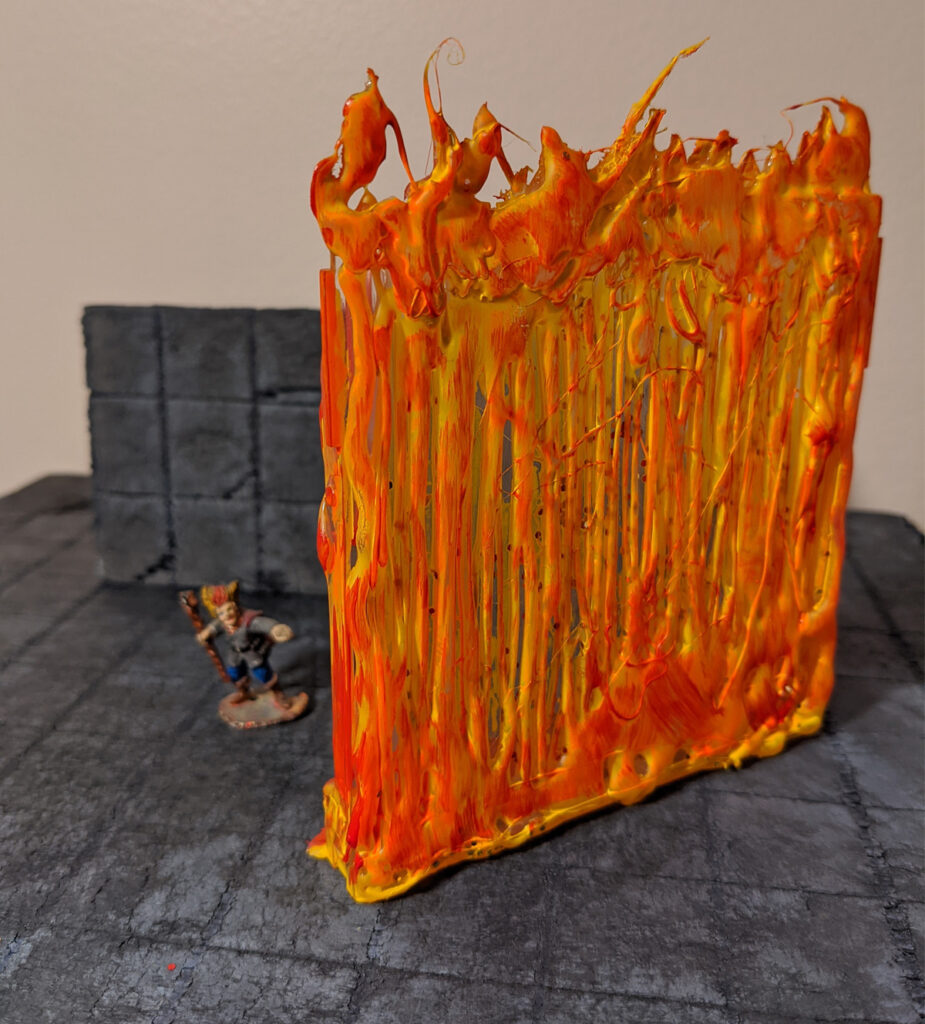
I hadn’t seen the wall of fire before. I’d seen a magic circle spell effect. The concept was the same and, as luck would have it I found this old, flat computer disk case in the bits box. I figured I’d pull it in half and each half would be it’s own wall. I popped on some safety glasses and went after the one side with my craft snippers. Safety glasses were a very good idea, trying to snip parts out of brittle plastic… not so much. After completely destroying one half of the box I decided that minimal changes to the other side was the way to go. I liked the fact that is has a square edge that will help it stand without some kind of crazy extra base addition.

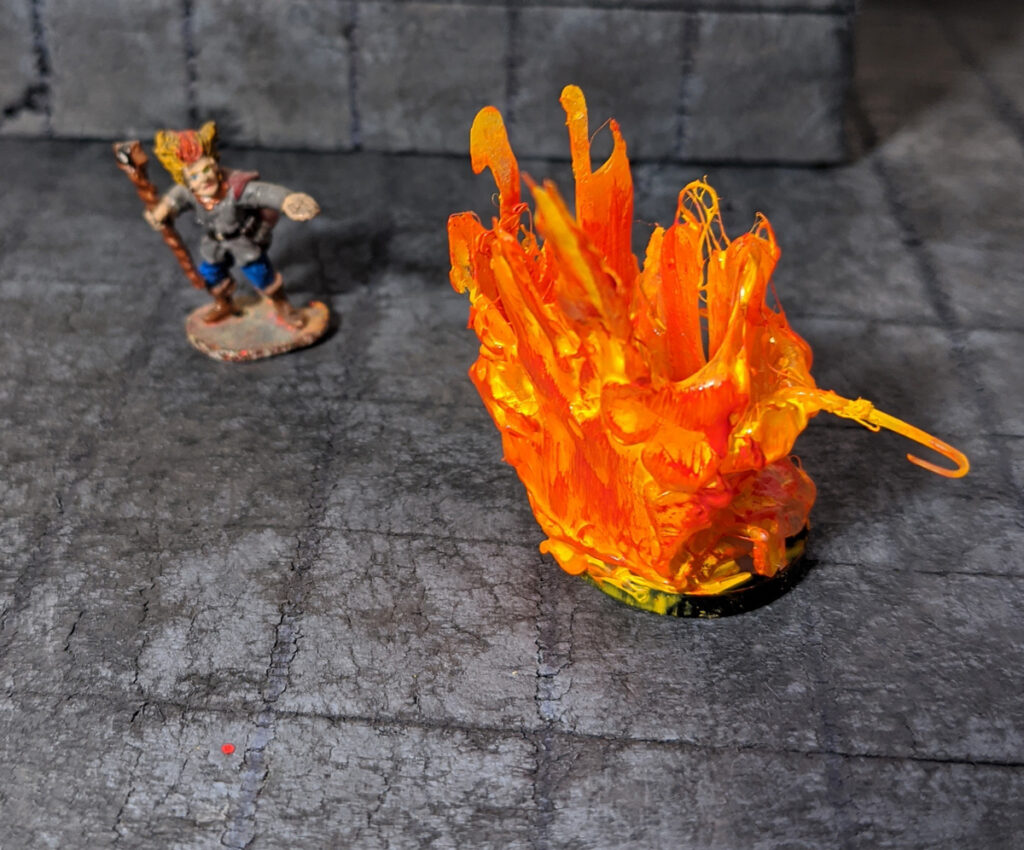
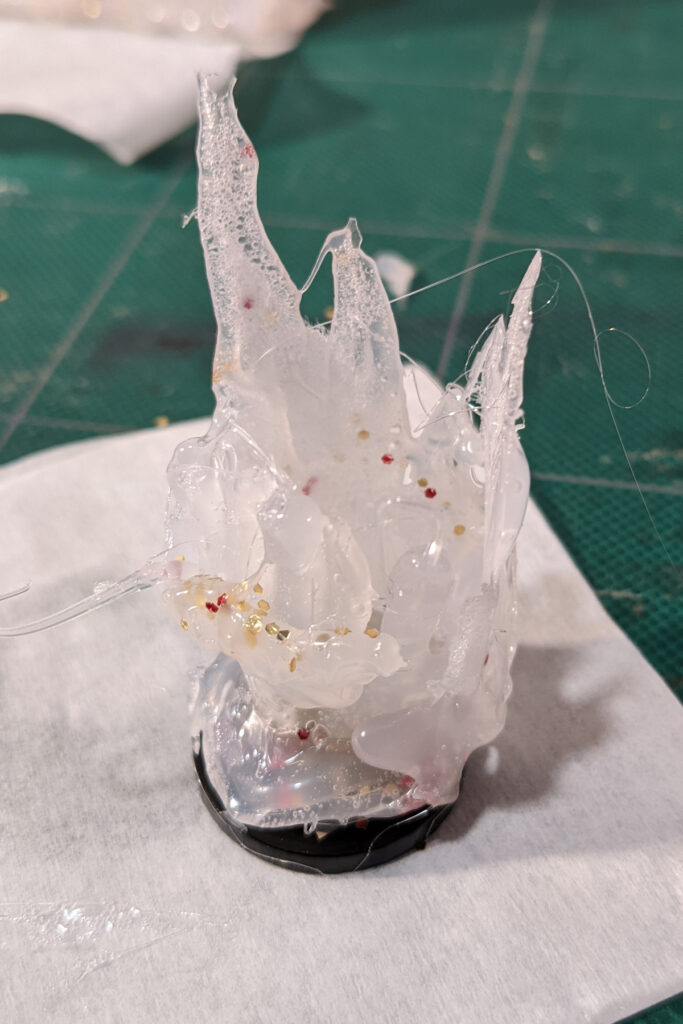
I also had this thought about the flaming sphere. I was going to use a miniature base and start with a clear pony bead. I also planned to sprinkle a little bit of glitter into the glue as it was cooling. I figure that each of these things is a magic spell effect and a little glitter wouldn’t hurt. I thought I could start with a little bit of glue in the center of the base, pop the bead on there then start working my “sphere” outward from there. As it turns out, gravity was not my friend here. It made everything droopy and very non-sphere like. I changed tactics. I laid out a flat set of flames on the parchment paper and decided to curl that around the round mini base. The effect would be less “sphere” but it would still give the idea. I went with it.

Not so spherical

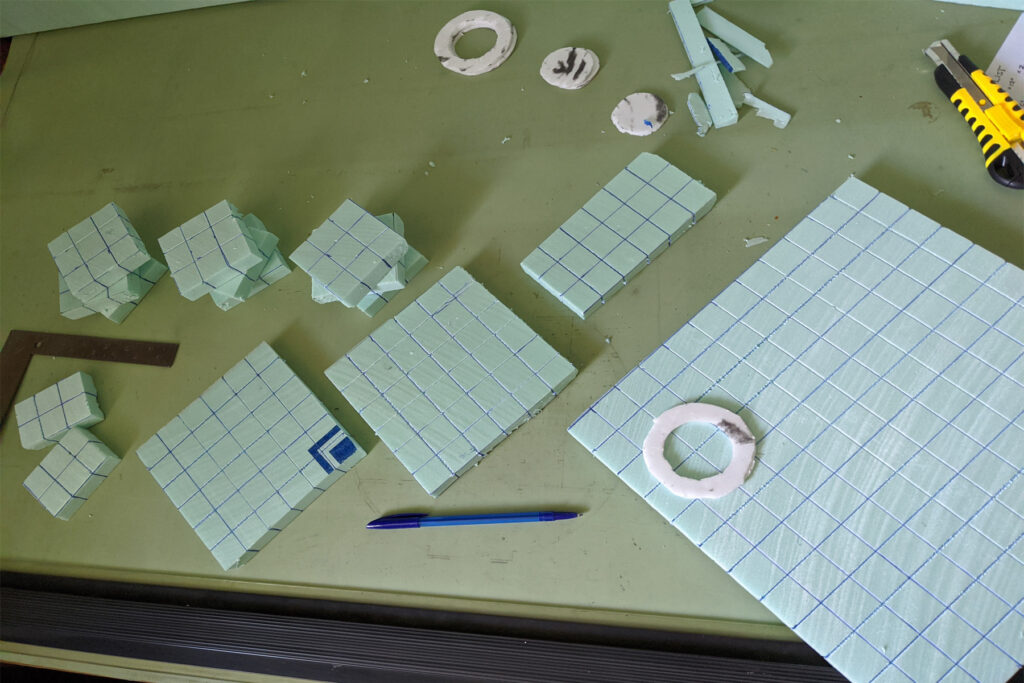
Forged ahead and started laying out the squares for the area effect things like web, tentacles and entangle. Normally parchment paper is really great for not sticking to the hot glue. This time for some reason, when I laid out my squares the paper just would not let go of the glue. I did what I could and pulled them all apart once they were dry. Moving from piece to piece while waiting for things to dry was a big help. This is a definite bonus to multitasking.

Hot glue – the keyword is still “hot”

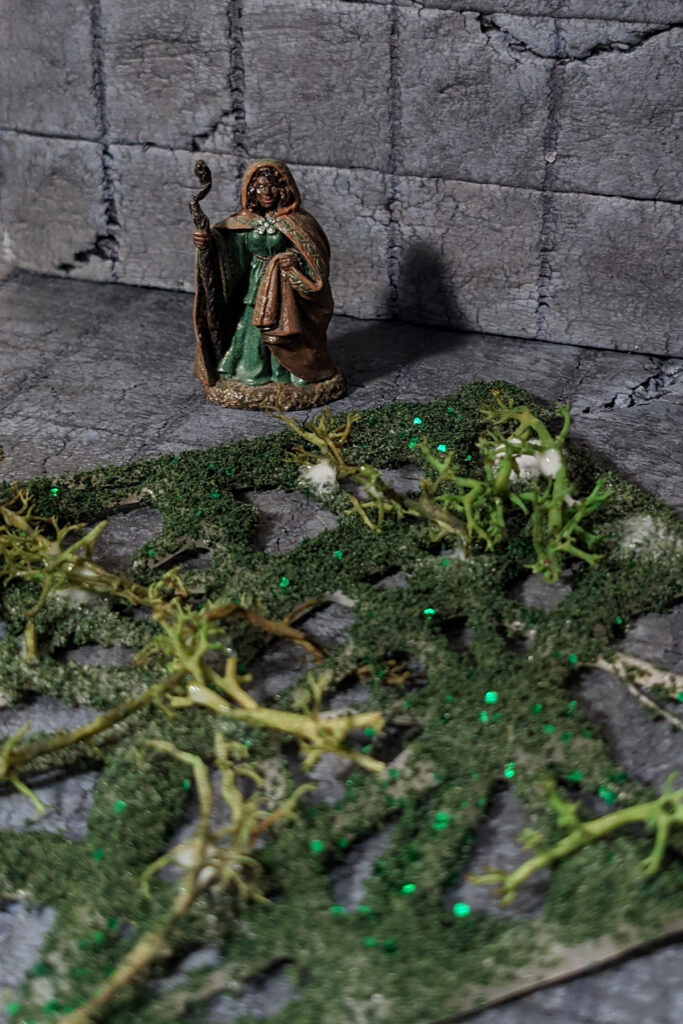
I gave a little bit extra to each of my squares. Some of it worked, some of it really didn’t. I used glow in the dark paint under the entangle spell. I added a little green glitter in with the flocking. I tried to get one or two extra bits of vine to stick and stay. The glow works where you can see it, if it’s dark enough. The flocking doesn’t look as great as I want it to and the vines just keep flopping off no matter what glue I use. I spray finished the whole thing and I’m just going to hope for the best. I added a little webbing from our Halloween decorations to my area effect for the web spell. I only painted the tentacles… and they seem to have turned out the best.

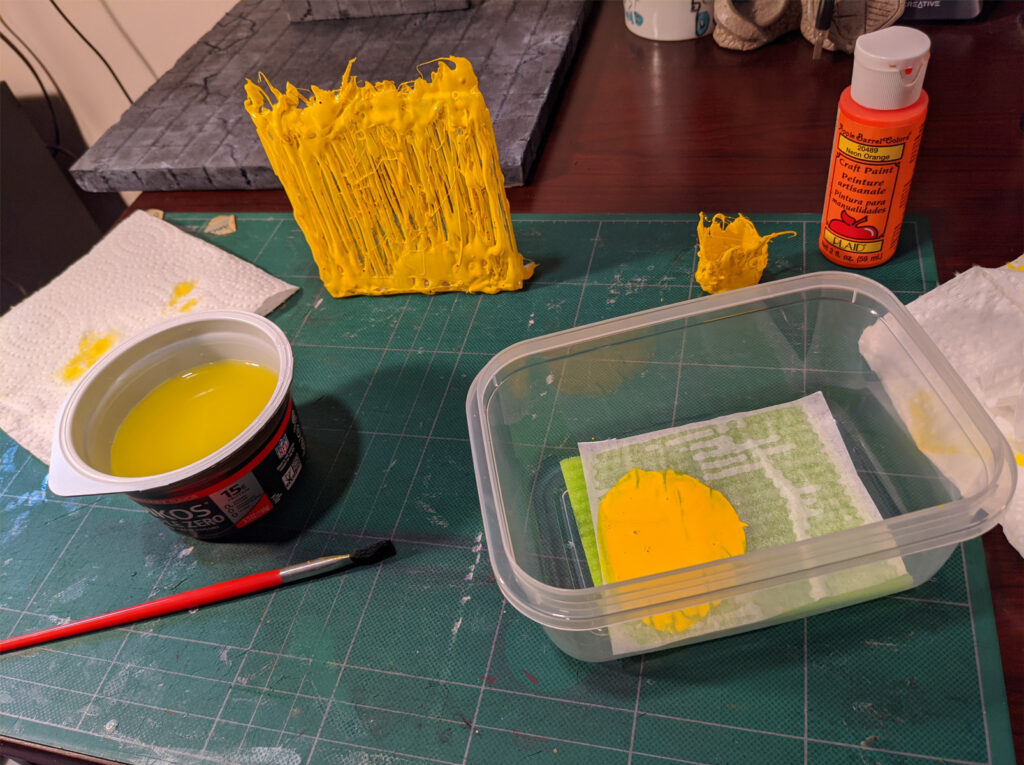
Painting the wall of flame and the flaming sphere worked out pretty well I think – and the wet palette actually is a super cool way to handle paints. I now understand why so many folks talk it up. I needed to take a break in the middle of these projects and when I got back all the pain was just as if I hadn’t left at all. I’ll be looking to the wet palette from now on.

I probably need to resize my wet palette

I struggled with various parts of each of these projects. The biggest issue I have still, is patience. I’m working very hard at getting better with this. Paint needs time to dry. Glue needs time to dry. Hot glue needs time to dry of you’ll burn your damn finger… again. Sometimes the effect you think will be great doesn’t work out that way. It’s a learning process. I’m looking forward to doing a lot more learning on these sorts of projects moving forward.

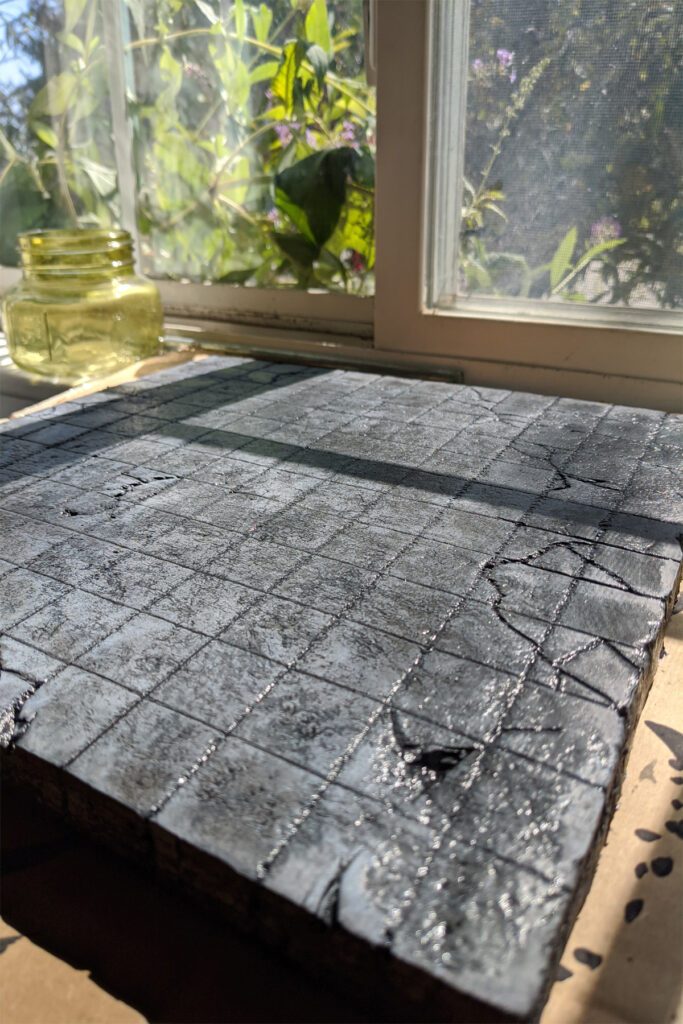
Here are some of the finished looks:

Sinister Black Tentacles
Entangle, magically wrapping you in nature
Web, tangled up and waiting for a spider
Fairly non-spherical flaming sphere
An imposing wall of flame!

Tiling

When I was a kid playing Dungeons & Dragons there weren’t many options when looking for parts to enhance your game. The hobby was relatively new and the market was just ramping up. You may be thinking, “here we go, another things were better back in the day statement”. Not so. I’m actually stunned, amazed and really happy about where things are for D&D and associated parts of the hobby right now.

Some lucky few of us as kids were able to work for or add to the Christmas list official D&D miniatures. I’ve managed to hang on to those, but I no longer have any of the other things we used to supplement our game. One of the things we used to do was carve up any corrugated cardboard we could lay out hands on and cut them up into various combinations of squares. These flat ’tiles’ became what we used to represent the fabled 10′ x 10′ stone corridor that has become synonymous with classic dungeon crawls. I clearly remember the shoe box of cardboard I had filled with various combinations of corridor or room that could be laid out to show the ‘surroundings’ of the miniatures we were using. The imagination assistance worked really well.

Fast forward to today. There are multiple companies out there now selling every sort of miniature pieces or parts for dungeon masters to layout and confound players with. The pure art of these pieces really is exceptional.

An example of a professional modular set.

It is also expensive. Paying the artists is important, but frequently WAY out of budget range.

Happily, the internet has also provided a way to connect with other people that are just as excited about creating these worlds as I am. There are literally thousands of folks out there coming up with new and imaginative ways to use various bits and pieces from around the house to create these worlds on a budget. I started posting a little while back about my journey back into this, and I’ve gone back to the very basics.

I made up some dungeon tiles.

It’s a very beginner level project. I saw a fellow crafter post something wondering about being proud of simple things, like these beginner projects. One of the most challenging things I’ve found about digging back into this hobby is learning to be patient and go through the various steps toward learning and experience. You don’t get to be a pro on day one. Stack up the lessons… and the dungeon tiles.

I started off with 1/2” extruded polystyrene insulation board (XPS) and carved up a bunch of shapes that would be my new set of tiles. I did all of this with a metal carpenters square, a pen and a box cutter. No high end, out of the budget stuff here. After carving all those bits up, I understand why crafters go after hot wire cutters and other expensive tools. This was labor intensive. I found that even on my best cuts, I wasn’t necessarily square or plumb. I forged ahead. These were meant to be faux stone after all. Anything carved by hand would have imperfections and odd edges.

Carving out a stack of tiles!

Once all the parts were cut, I laid out a 1” x 1” grid on all the tiles. This is the size of a large number of standard miniature bases and provides a convenient method for estimating distances at scale. I also added in a number of imperfections using the ball point pen. The idea was to gouge the foam. This would allow paint to get into the cracks and show the variations when painted. When I was painting I discovered that I probably needed to apply more pressure when creating my textures and adding cracks. I don’t think I went deep enough in many cases, so the paint mostly filled some of the cracks I made. As a YouTube crafter I follow said, “Crack to taste”. I did. I’ll do better next time.

Crack to taste.

Once all the parts were set it was time to paint. It’s been a long time since I attempted to judge how much paint I might need in order to cover various miniature parts. I managed not to waste too much in my multiple coats. Black was first. I watered down a little bit of straight up black craft paint and covered them all. This would show up as deeper shadows whenever the rest of the paint was applied and didn’t seep down into all the cracks. Just had to wait for it to dry.

Once that was dry, it was on to a gray coat. This gray was applied pretty heavily. I was afraid that I had over done it when I finished with the gray. Some of the cracks had filled in. It was hard to see the texture. I wasn’t super happy, but I was this far along, I just needed to keep rolling. And wait for it to dry… again.

I thought it was too heavy, or too dark… or too… something.

Next up was a dry brush over the high points. I misjudged the amount of paint a couple of times and my brush was not nearly as ‘dry’ as it was supposed to be. I used some paper towel and dabbed the excess back off when I could. I mixed a light (dolphin) gray along with a color called blue stoneware. It gave things a bit of a blueish tint, but that’s OK. It was what I was going for.

The black crisscross pattern is actually the shadow of the window screen

Just had to wait for things to dry… again.

No good…

Once that bit was done, it was on to the wash. Back to black, but super watered down. I forgot to add in any sort of green or brown to add a feel of “grime” to this part, but I was just happy to be moving on. Looking back, I might have wanted to give each step a little more thought. As I said above, nobody’s a pro on day one.

Post wash

As things turned out, I’m a lot happier with them after all the steps were finished. So now it’s just a matter of sealing things up with a glue wash and stacking these up. Ready for my next gaming session! I’m calling this a success and I’m already looking forward to making more stuff.

Have you made anything lately?